Showing posts with label Cooking. Show all posts

Thursday, May 5, 2011

Chicken Tacos


Prep time: 15 minutes Serves: 4-6 or however much you decide to make

Another easy one for you that you can do any time of the year and it is healthy, easy to transport if needed, and yummy!

There is one catch though----the thing that makes this for me is the salsa. You can choose your own but I really like the Trader Joe’s Tomato-less Corn salsa. It has a little kick and is sweet at the same time and really makes these tacos more than just chicken in a tortilla.

Ingredients:


Tortillas (corn, or white corn best--- or small flour if prefer)
2 Chicken breasts, cooked and cut into strips
Cilantro- chopped
Tomatoes – chopped (I threw some diced jalapeno in mine for some extra flavor)
1 can Black beans, rinsed
Salsa
Optional: corn (if not already in your salsa)

Salt and Pepper and cook the chicken (Foreman grill makes it easy), let it sit for a few minutes and then cut into strips. Place in a bowl
Wash and chop the cilantro. Place in bowl.
Wash, and chop the tomatoes. Place in bowl. ( Are you catching a theme here?)
Open, rinse, drain the black beans. Place in bowl.
Open corn salsa. Add spoon.
Heat the tortillas.
Make a fruit salad or rice salad or some side.
Assemble and enjoy!

If you are transporting this just throw each ingredient into a baggie or Tupperware and have the recipient heat the tortillas right before eating.

The color alone in this meal will draw you in and make you wish for sun and fun!


Saturday, January 22, 2011

Chicken Picante

Serves :4
Oven Preheat: 375 degrees F
Prep time: 5 minutes
Total Time: 1 hour
Easy, easy recipe from the back of the Foster Farms frozen chicken package...it happened one evening when I had zer0000000 inspiration and pulled the chicken out to try and come up with something and then I saw it. The recipe on the back of the bag with just a few ingredients and I had them all. Yipee! Dinner was started and it ended up being pretty good.
Easy to transport, simple ingredients to satisfy anyone and not too spicy for the kiddos or new mommies.

Ingredients:
  • 4 chicken breasts
  • 1 cup medium chunky salsa
  • 1/4 cup Dijon mustard
  • 2 TB fresh lime juice
  • 1/4 cup sour cream
  • 1 lime cut into segments
  • chopped cilantro for serving
I added a colorful salad and some steamed corn to complete the meal.

  1. Preheat oven to 375 degrees F. Line a baking dish with foil.
  2. In a bowl mix salsa, mustard, and lime juice.
  3. Place frozen chicken breasts in pan. Top with salsa mixture. Cover with foil and bake for 40 minutes.
  4. Remove foil and continue cooking until the center of the largest piece of chicken reaches 165-170 degrees- about 10-15 minutes.

5. Remove chicken to serving platter
6.Place one spoonful of sour cream on each chicken breast and top with a lime segment. Garnish with chopped cilantro. (Or if you are like our family who doesn't care for sour cream than skip that part:)

- Heather

Sunday, August 22, 2010

Cheaters Strawberry Shortcake

This is the strawberry shortcake I grew up with and it is the "cheaters" version as it is on the box of Bisquick mix but it turns out great everytime! Easy to transport as you would only need to have the strawberries, biscuits, and cool whip in separate containers and the recipients could assemble easily for a tasty after dinner treat. If you really want to make them from scratch or you don't have Bisquick on hand I included a recipe from basic-recipes.com.

Serves 6

Ingredients:
  • 4 cups sliced fresh strawberries
  • 1/2 cup sugar
  • 2 1/3 sups Bisquick mix
  • 2/3 c milk
  • 3 TB sugar
  • 3 TB butter. melted
  • 1 container whipped cream

Directions:
1. MIX: strawberries and 1/2 cup sugar, set aside. Heat oven to 425 degrees F.

2. STIR: Bisquick mix, milk, 3 TB sugar and then butter until soft dough forms. Drop by 6 spoonfuls onto ungreased cookie sheet.
(I rolled and cut mine out this time but I think I like the drop method better- lighter biscuit)
3. BAKE: 10-12 minutes or until golden brown. Split warm shortcakes; fill and top with strawberries and whipped cream. Serve.

YUM!

Shortcake recipe from scratch:
  • 2 cups of flour, sifted
  • 3/4 teaspoon of salt
  • 2 tablespoons of sugar
  • 3 teaspoons of baking powder
  • 1/2 cup of Crisco
  • 1/2 cup of milk
  • 1 quart of fresh strawberries, crushed & sweetened
Steps:
  1. Sift dry ingredients and cut in Crisco.
  2. Add milk, mixing to soft dough. Knead.
  3. Roll 3/4 inch thick.
  4. Cut with 3 inch biscuit cutter and place on baking sheet greased with Crisco.
  5. Bake at 450ºF. for 12 minutes.
  6. Split biscuits and put berries between.
  7. Top with whipped cream and whole berry. Serves 6.

Friday, April 23, 2010

Baked Ziti

This is an easy recipe, transports easily, fills you up, kids seem to enjoy it and so far between company, bringing it to people’s homes and our own dinner table it is warmly received and seconds are a given. Okay that might have been a run-on sentence but you get the idea. It is also super easy to freeze and then bake later since everything is pretty much cooked before you put it in the oven. Add bread, a veggie, and a salad and you are good to go.

Ingredients

Lasagna-Style Baked Ziti from Real Simple serves 6-8

Hands on time: 20 minutes Total time: 45 minutes

  • 1 pound ziti (looks like skinny tubes)
  • 1 TB olive oil
  • 1 large yellow onion, diced
  • ¾ tsp kosher salt
  • ¼ tsp black pepper
  • 1 pound lean ground beef
  • 3 cloves garlic, minced
  • ½ c chopped fresh oregano (optional or just use less dried)
  • 1 26 oz jar pasta sauce
  • ½ cup (2 oz) grated Parmesan
  • 1- 15oz container ricotta
  • 1- 10oz box frozen spinach, thawed and squeezed to remove liquid
  • 1 c grated mozzarella

Instructions

  1. Cook ziti according to the directions on package

  2. Heat the oven to 400 degrees

  3. In a large pot ( or I have a large wok that works too), over med-low heat, heat the oil.

  4. Add the onions, salt and pepper. Cover and cook until the onions are softened 5-7 min

  5. Add the beef, increase heat to med-hi and cook until no trace of pink remains (5-8m)

  6. Add the garlic and oregano and cook for 2 minutes

  7. Add the pasta sauce and heat for 3 minutes

  8. Remove from heat, add cooked pasta and toss to coat


  9. Add parmesan, ricotta, and spinach. Toss again.

  10. Spread the mixture into a 9 x 13 inch baking dish (I usually can get a 8 x 8 out of it too and I freeze one for another meal).

  11. Sprinkle with mozzarella and bake until it melts---about 15 minutes.


This is what I mean when I say I get an 8 x8 out of it too. Granted, I could really fill up the 9 x13 until it is overflowing, but I tend to think this is a better option and then I get another meal out of it too. Always a good option!


As a side I will often slice up zucchini and steam it for about 5 minutes in a covered dish with about 2 TB of water. Then season with S/P and you can add a little butter if desired.


- Heather

Monday, April 12, 2010

Quick and Easy Chicken Pasta Toss

Serves 6-8
Prep Time: 20 minutes

This is a recipe that came on the lid of the sundried tomatoes years ago and I tweaked it a little and use it often…especially if I am low on time and low on imagination and energy. Plus it is a healthy, easy to make, and yummola pasta toss. This makes a great dinner to bring to anyone as it is healthy, tasty, and combines a lot of food groups into one meal. And as you will see from the last picture, rarely are their leftovers. But by chance you might have some leftovers, it makes for great lunch or dinner the next day or two.


As you can see from the picture….I forgot to take a picture of the ingredients until after I started cooking so the chicken, and Parmesan cheese is missing....oops! One thing to know is that this recipe is flexible and you can use what you have on hand (almost).


Ingredients:


  • 1 lb Farfalle (bowtie) pasta (but I have been known to use whatever is on hand including cheese tortellini)
  • 2 chicken breasts- cooked and cut into strips or chunks
  • 2TB olive oil (preferably from the sundried tomato jar)
  • Sundried tomato (Costco sells a big jar that is perfect to have on hand)
  • Parmesan cheese
  • Broccoli – cut into bite sized florets (or whatever green veggie you have….I have used asparagus, sugar snap peas or a combo)
  • Pesto sauce (once again Costco sells a great one that I just keep in the freezer and then use what I need)


Okay, are you ready….are you sure….here we go:

  1. Boil the water and start cooking the pasta al dente.
  2. Cook the chicken either (1) whole and cut later or (2) cut first for quicker cooking. (I have been known to do both of these methods depending on the time I have - cutting it up ahead of time cuts down on time - just make sure not to overcook and dry the pieces out. Heat up a skillet, dribble a little olive oil and throw your pieces in until the pink is all gone and the chicken is cooked through)
  3. About 3 minutes BEFORE the pasta is done throw in your veggies. Yes, put your veggies into the boiling pasta and let them all cook together until the veggie is tender al dente.
  4. Cut up chicken into bite size strips or chunks (if not done previously)
  5. Strain pasta and veggies and put into bowl with olive oil, pesto sauce, sundried tomatoes, chicken, and Parmesan cheese.
  6. Toss and enjoy!


Serve with a side salad, and bread if you want….


TOLD YOU IT WAS EASY!


- Heather Miller

Friday, December 4, 2009

Food Safety - Your Refrigerator

Why do we refrigerate foods?
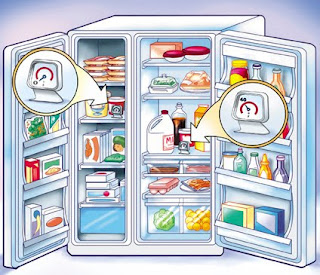
Refrigeration slows bacterial growth. Bacteria exist everywhere in nature. They are in the soil, air, water, and the foods we eat. When they have nutrients (food), moisture, and favorable temperatures, they grow rapidly, increasing in numbers to the point where some types of bacteria can cause illness. Bacteria grow most rapidly in the range of temperatures between 40 and 140 °F, the “Danger Zone,” some doubling in number in as little as 20 minutes. A refrigerator set at 40 °F or below will protect most foods.

http://www.fsis.usda.gov/PDF/Refrigeration_and_Food_Safety.pdf


Stay out of the "Danger Zone" in your refrigerator!

When it comes to meal preparation and storage (Leftovers), knowing how refrigeration affects different types of foods can save you from making yourself or, even worse, someone else painfully sick.

Here are the refrigeration times for some of the most common CaringMeals:
- Opened Luncheon Meats: 3-5 days
- Ground Meats: 1-2 days
- Chicken: 1-2 days
(be careful with chicken and ground meat!)

For an in-depth explanation of this topic, the USDA has provided a complete guide to food safety:
http://www.fsis.usda.gov/PDF/Refrigeration_and_Food_Safety.pdf

Their Food Safety home page is:
http://origin-www.fsis.usda.gov/Food_Safety_Education/index.asp

You can even call them at 1-888-MPHotline! Your tax dollars at work!

Monday, November 30, 2009

Prepare and Conquer

To allow for shopping time and preparation, try to begin planning your meal 2 days before the delivery date (CaringMeals.com will send you an email reminder 2 days before your delivery date). Let's look at some tips for planning and cooking your meal...

When choosing a meal to cook for someone else, I have found that this generally is not the time to try out a new recipe. Figuring out a new recipe and wondering how the dish will turn out only adds stress. Meals that your family likes are a good place to start. Of course you want to pick one that is easy to pack and transport. If you decide to try something new, make to cook it at least once for your family (if you have the time).

It’s good to have a stock of recipes that have worked in the past. You don’t need too many because typically you'll only take one meal to a family. It really doesn’t matter how many times you take the dish because it is always "new" to the recipient. Besides, the more you make your favorites, the better you get at it and the easier it is to make!

Having said all that, my favorites are Shepherd’s Pie and Stews/Soups. Most adults and children like these. Casseroles can be assembled bit-by-bit over a couple days and can include all the main food groups. Most of them also refrigerate or freeze well.

A Simple Suggested Preparation Schedule:

1. 2 Days Before : Shop and make sure you have all ingredients. Start chopping veggies.

2. Day Before : Start cooking and assembling dish. Make the dessert.

3. Delivery Day : Finish final cooking, packing. Make call to confirm delivery, if necessary.


- Sabina James

Wednesday, November 25, 2009

Gawking at Food

There are a million recipes online, but when you can see beautiful pictures of the food being prepared, the recipe really becomes inspiring.


For example, take a look at this:
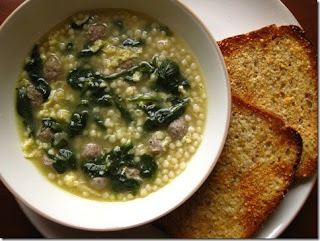
http://iowagirleats.com/2009/11/24/id-marry-this-soup/
Seeing the meal is so much more exciting than just reading about it! If you like what you see, browse all of the pictorial recipes on Iowa Girl Eats.


If you love looking at food (and getting ideas for cooking CaringMeals!), take a look at http://foodgawker.com/. It is user sorted directory (the most popular sites are at the front) of food pictures and recipes from all over the Internet.

Enjoy and Happy Thanksgiving!